DNA is a trusted importer and supplier of electronic components in India, serving engineering students, hobbyists, OEMs, startups, R&D labs, and system integrators. We provide a wide selection of Electronic Components with fast dispatch and pan-India delivery. We offer GST-compliant invoices to help you claim tax input credit. Invoices are issued under DNA Solutions (GST No: 27BGPPS9522M1ZF).
Why buy from DNA? Founded in 2006, we’ve earned the trust of 1000+ buyers across India from colleges to production lines. Choose DNA for reliable service and fast delivery of quality electronic components. We also Import electronic components on request as per your requirement. Check out our Google Business Profile for reviews.
We specialize in Hongfa Relay, ASUS SBC, Meanwell SMPS, DFrobot, Plantower, Waveshare, Winsen sensors, XlSemi, Nextion Hmi Displays, Relimate Connectors, XY2500 Connectors Block or Combicon Connectors, GX12, GX16 & GX20 MRS Aviation Connectors and IP65 Enclosures as well. We help customers with custom import of Electronic Components and bulk order support. If you need help with component selection or BOM uploads, our sourcing experts are ready to assist.


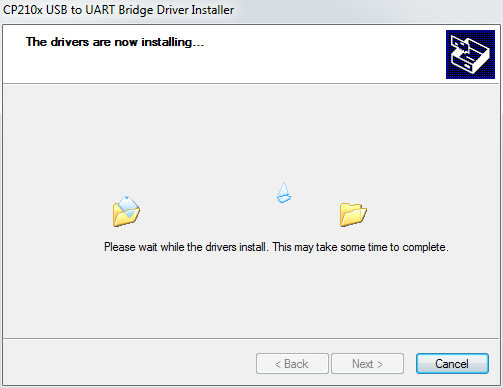
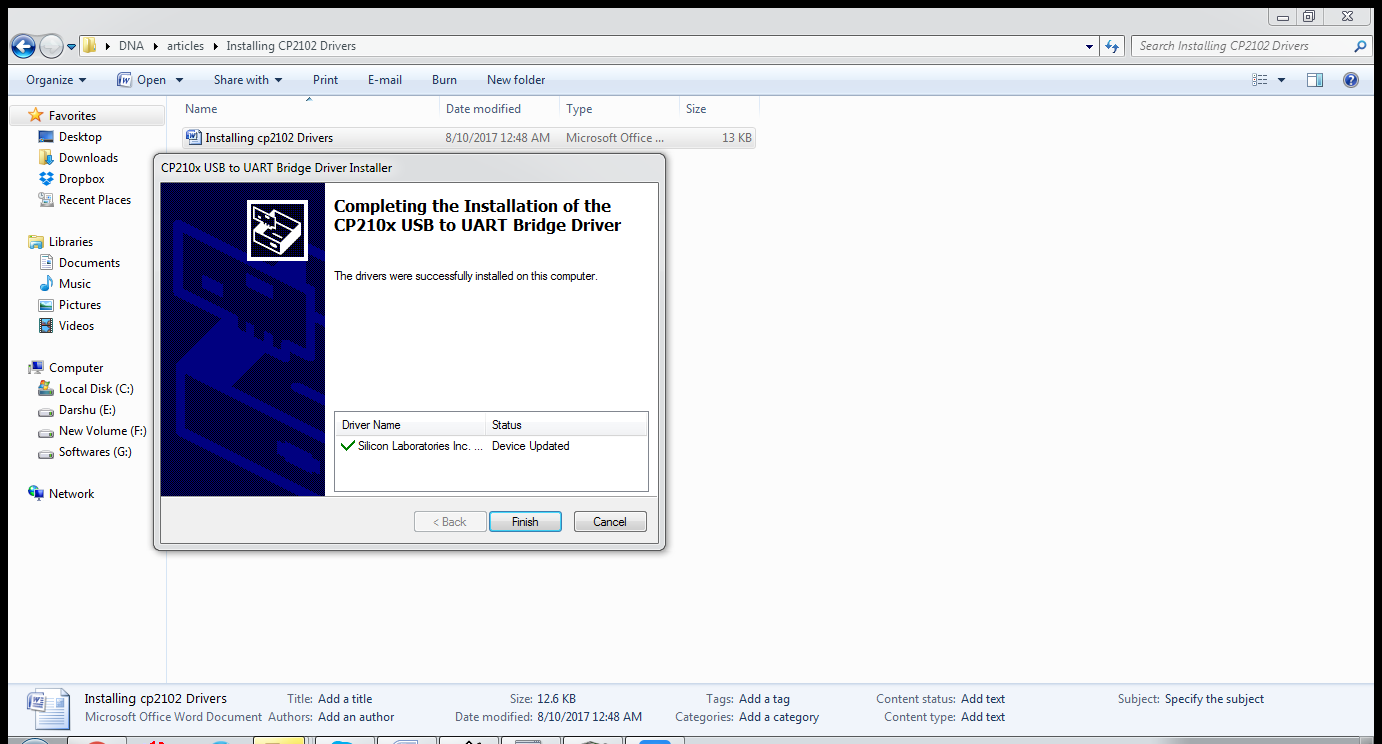
")